Line Spacing: The Final Frontier
Have you ever wanted to move lines of text in a message closer together or farther apart? Have you ever wished you could squeeze your entire message into one slide or layout but couldn’t because there was too much space between lines of text? This blog is for you! Learn how to create effective messaging through custom line spacing in the Web Editor and Content Studio.
Daktronics Commercial Software Training on 9/19/2024
Categories: Venus Control Suite Training
Tip of The Day
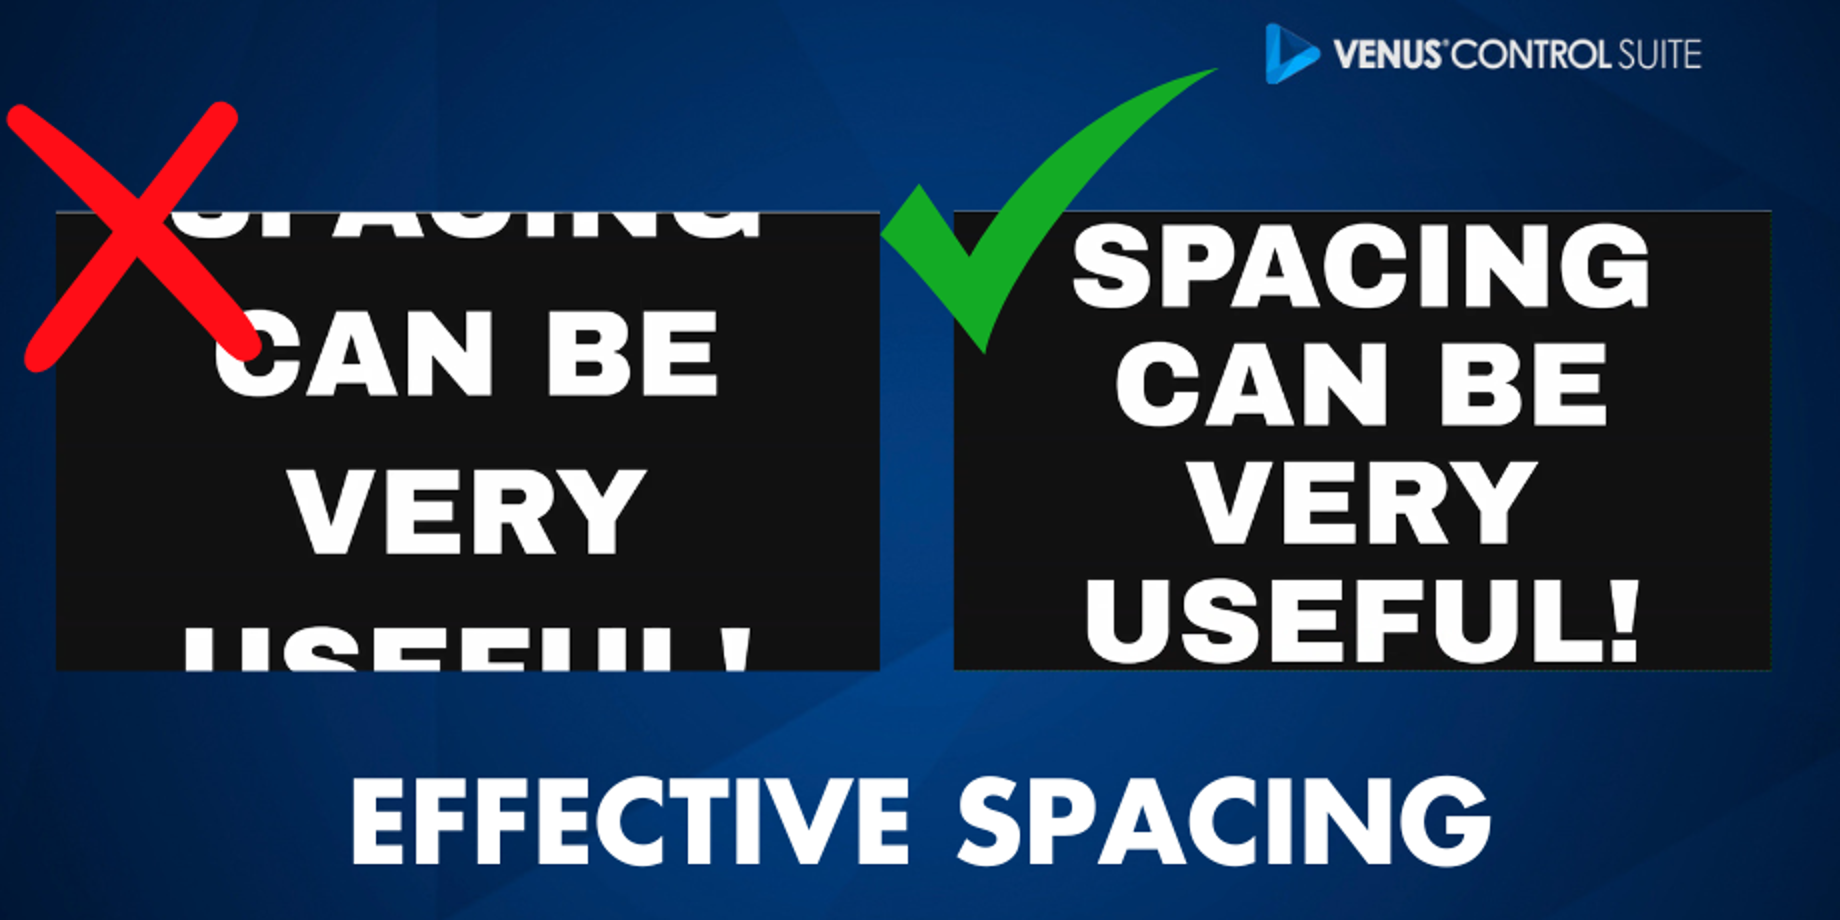
We don’t recommend trying to squeeze multiple lines of text onto your LED display as that will not effectively reach your customer. It is better to create brief messages in a font size that fills your entire display like the example shows below. However, we do realize that with some fonts, the default line spacing can leave you struggling to even do that, which is why you should keep reading!
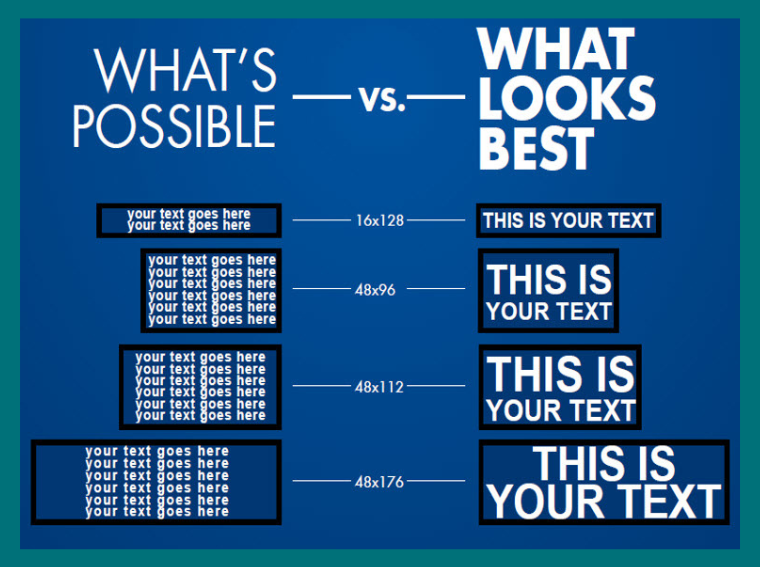
Have a lot to say? That's okay! Split up your messages between multiple slides. Or if you have a flyer you would like to recreate for your display, learn how to transform website or flyer information to beautiful LED content!
Using Spacing in the Web Editor
Head over to the Web Editor app to get started!
In order to adjust your line spacing you will have to navigate to the Font section of the right-side menu. At the very bottom of that menu you will see a Line Spacing section that can be dropped down to reveal a slider set at “0 px.” This is the default line spacing for the particular font that you chose for your message.
Use the slider to adjust the the distance between each line. Sometimes when switching from the default Arimo font to the bolder options you will notice the message drastically changes with an extra line of text. Before you try making the text a smaller font size, check to see if that current font and size works with a negative spacing. Watch as the message goes from being cut off, to BIG, BOLD and ready to be seen!
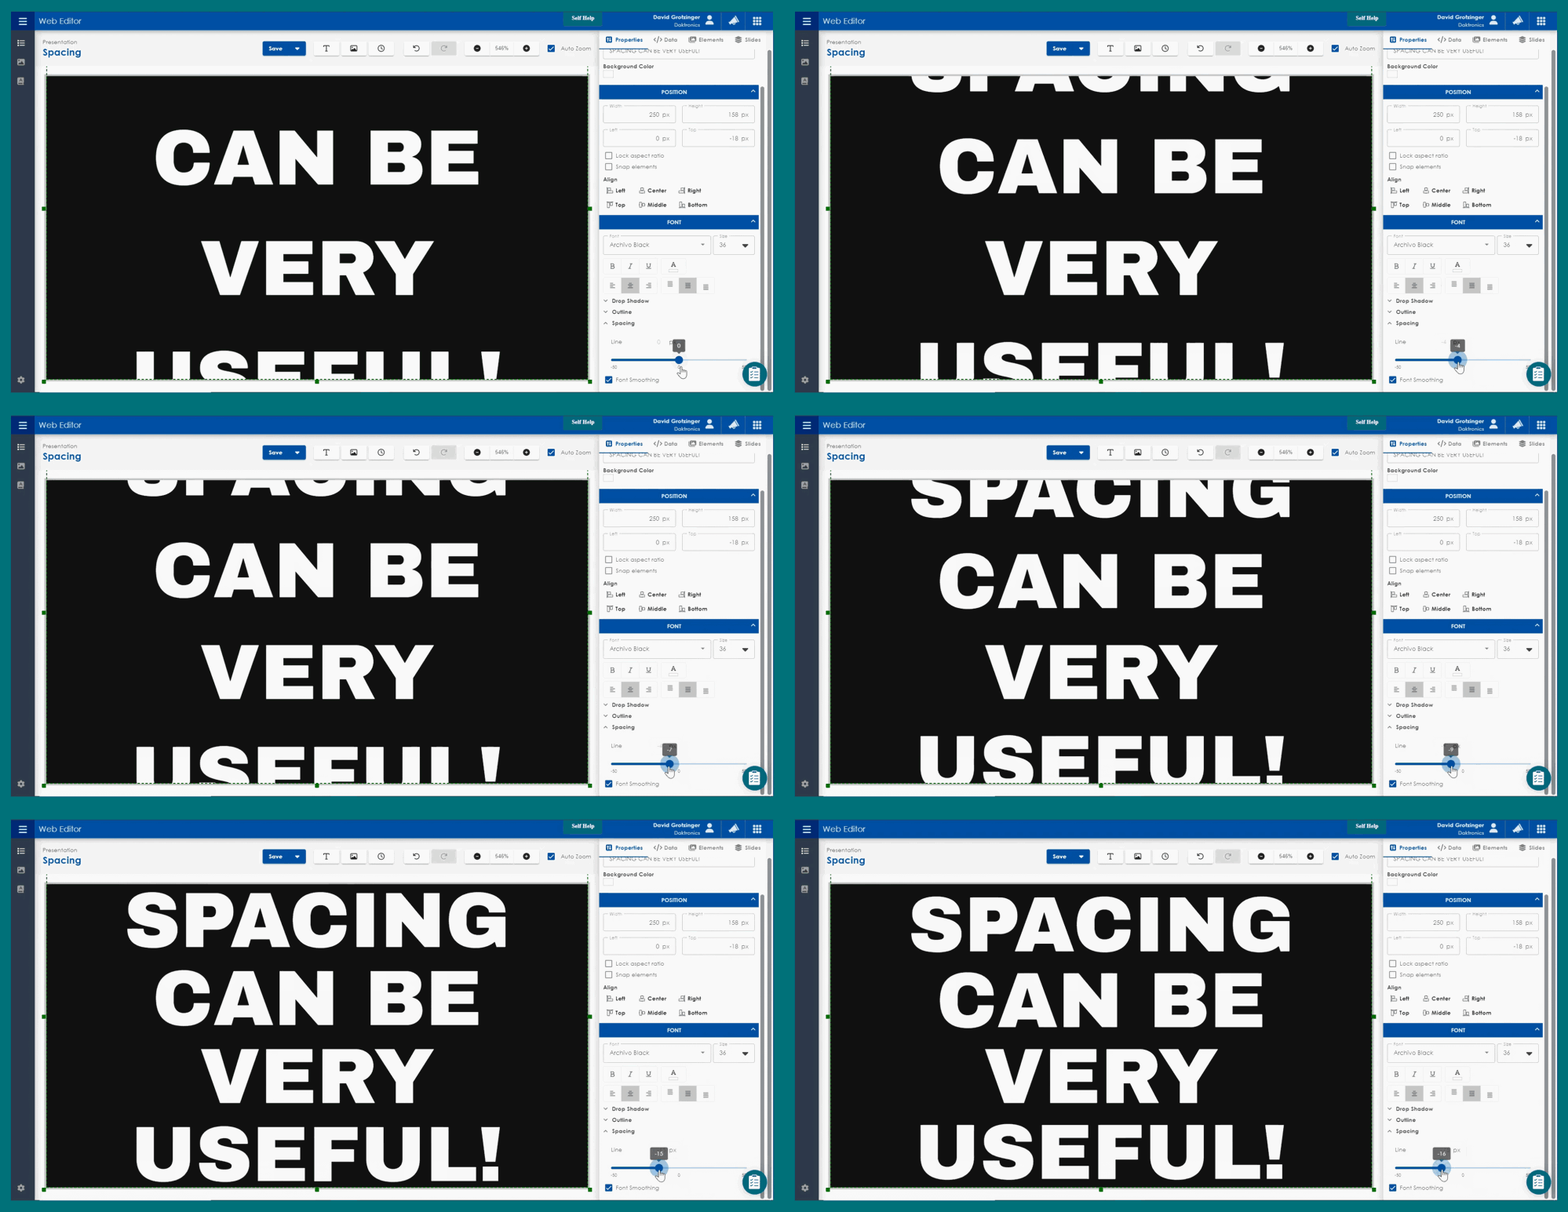
That’s right folks, it’s that easy! Don’t forget to click Save when you’re finished!
CONTENT STUDIO
Content Studio is a free, downloadable content creator that gives you the ability to add in effects to your text or elements. Here, you can move lines of text or even the individual letters to become closer together or farther apart 1 pixel at a time to ensure accurate placement.
Insert a text box from the Home or Insert tab, and drag it out to your canvas. Click outside the yellow border to see the green dotted lines around your message. You can only edit text's font, colors, spacing, etc. once you see the green dotted lines.
Add or Remove Space Between Lines
Click the Line Spacing tab, in the Paragraph group, on the Home tab.

The font’s assigned line spacing is the default setting. The line spacing function places space between lines without highlighting text.
Choose the number of pixels (points) to include between the lines of text from the Line Spacing drop-down menu. Pixel widths range from 0 to 10. The larger the number, the more space between the lines.
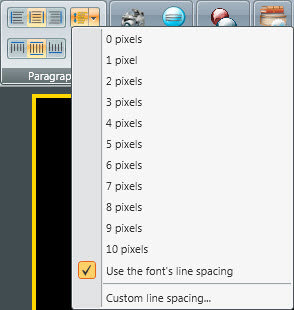
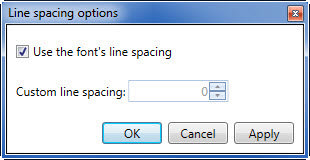
Trainer Tip: You can also click on Custom Line Spacing to adjust the number of pixels between lines of text. First uncheck the “Use the Font’s Line Spacing” checkbox, and then use the arrows to move your lines of text closer together or farther apart. Negative numbers move lines closer together.
Change the Space Between Letters/Character Spacing
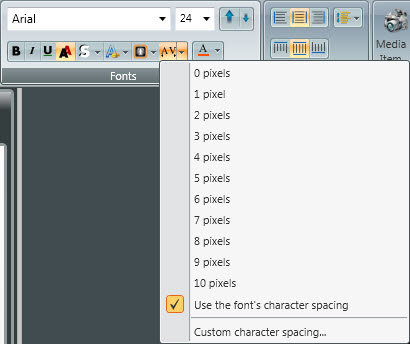
Go to the Home tab, in the Fonts group, click the Character Spacing button.

Choose the number of pixels between the letters/characters from the Character Spacing drop-down menu. Pixel widths range from 0 to 10. The larger the number, the more space between the letters.
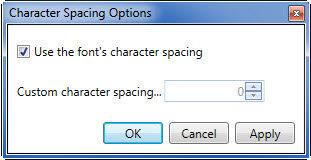
Trainer Tip: You can also click on Custom Character Spacing to adjust the number of pixels between characters. First uncheck the “Use the Font’s Character Spacing” checkbox, and then use the arrows to move your characters farther apart.
Whether you’re using the Web Editor or Content Studio to adjust the line spacing in your messages, be sure to leave some space between the lines of text. You don’t want to have lines of text overlapping (touching or on top of each other) because then people won’t be able to clearly read and understand your messages as they pass by. Follow along for more Trainer tips by subscribing to our blogs, and collaborate with other users in our VCS Facebook Group!
