Keeping Tabs on Your Tabs: The Layout Tab (Content Studio)
Learn all about the Layout tab in Content Studio and how to apply Entry Transitions to your presentations.
Daktronics Commercial Software Training on 3/21/2018
Categories: Venus 1500 Training
Have you ever been out driving or walking around and noticed a transitional effect on someone’s display? What is a transitional effect? It’s when you see movement on a display right before the message comes into full view. This movement can be in the form of a fade, scroll, spin or one of many other cool effects.
People apply effects to their messages to add character and movement because displays with motion capture people’s attention more quickly and more effectively than static messages. Passersby will be more likely to notice the movement in their peripheral vision than a static message.
Animations and videos are also great for advertising. If you have a presentation or message composed entirely of text or numbers, a transition is a great way to get potential customers’ attention!
Why am I talking so much about transitional effects, you ask…?
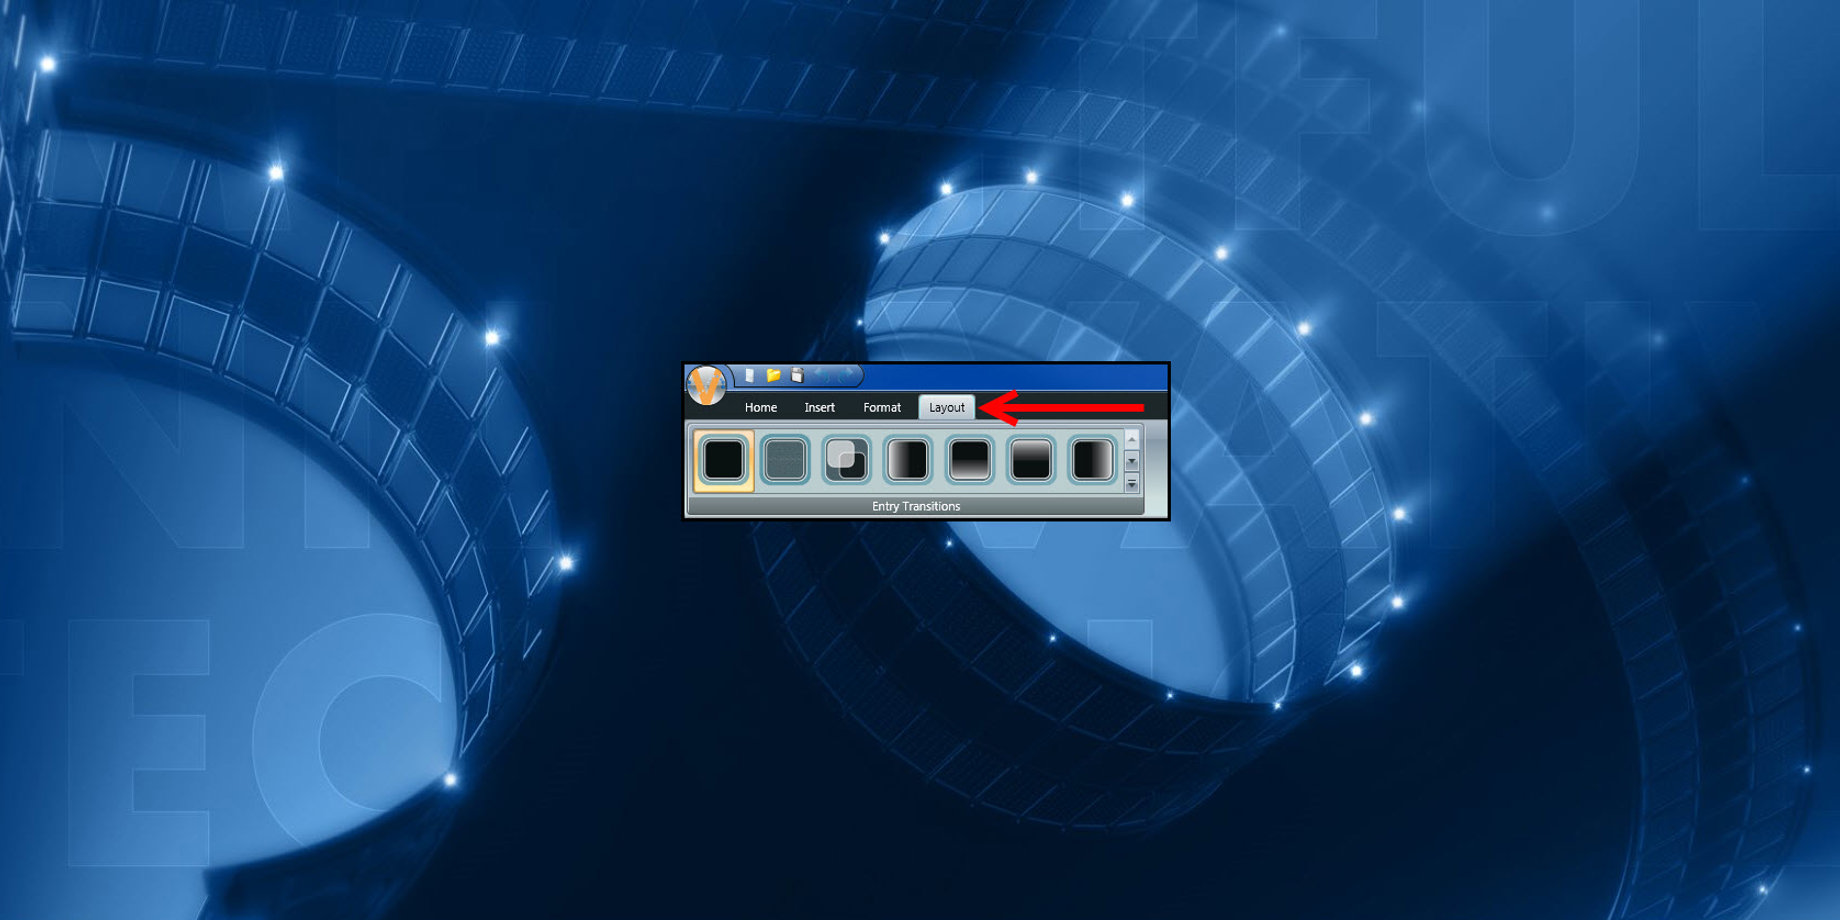
. . . because this week we are focusing on the Layout Tab in Content Studio! If you didn’t already know, the Layout tab is where you can find and apply transitions! The Layout tab itself is located between the Format tab and the View tab in the ribbon on top of Content Studio.

Entry Transitions
An often overlooked feature in Content Studio is the Entry Transition. However, when used effectively, this simple addition to a message can create really eye-catching content.
- Select a Layout and click the Layout tab in the ribbon to add an Entry Transition.
![The Layout Tab 1]()
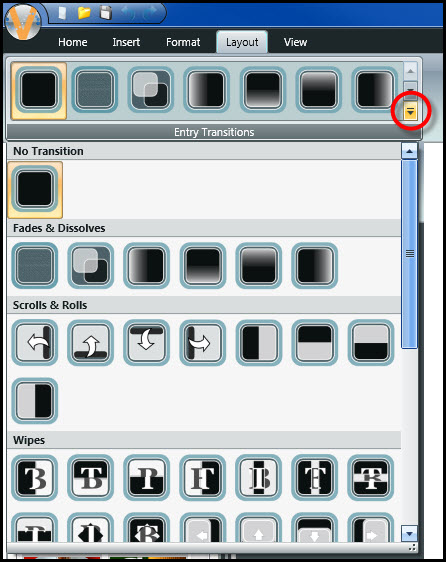
- Click the up and/or down pointing arrows to scroll through all available transitions.
![Up Arrow]()
![Down Arrow]()
Or, click the More button to see all available transitions. Be sure to read I didn’t know I could do that! Part Three: Odds and Ends to learn more about More buttons!
![More button]()
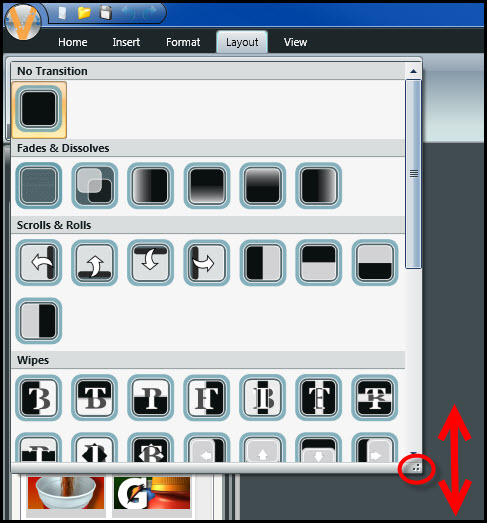
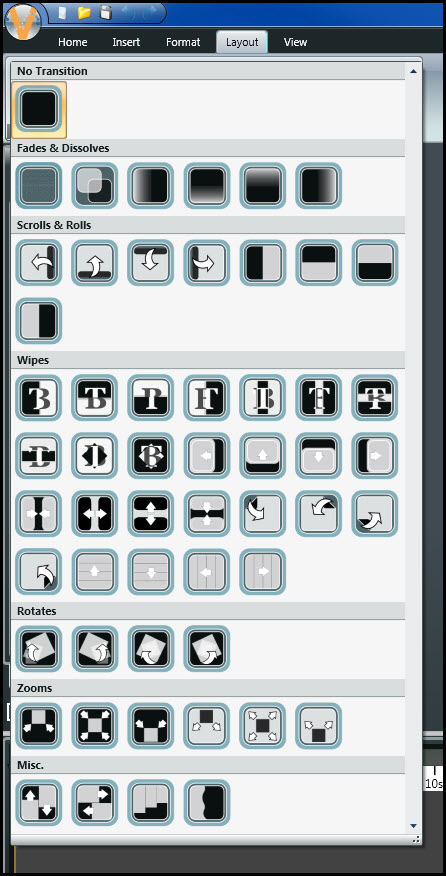
Or, click the dots on the bottom of the scroll bar to see all available transitions at once.
![Scrolling Dots]()
![All Available Transitions]()
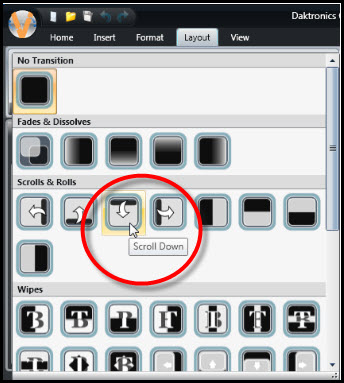
- Click the desired transition to apply it to the layout.
![Choose transition]()
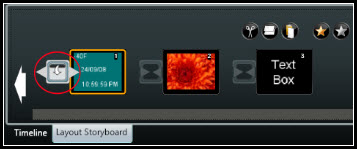
- In the Layout Storyboard view, the transition icon appears to the left of the layout it is applied to.
![Layout Storyboard transition]()
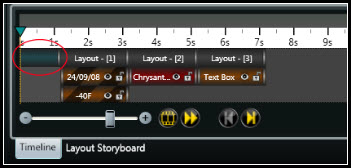
If the Timeline is enabled, the transition will appear to the left of the layout in the Timeline view.
![Timeline Transition]()
Speaking of which, there are actually two additional ways you can apply entry transitions to your layout(s) in Content Studio as well. Let’s go over those now, shall we?
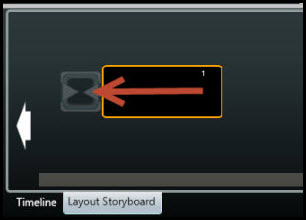
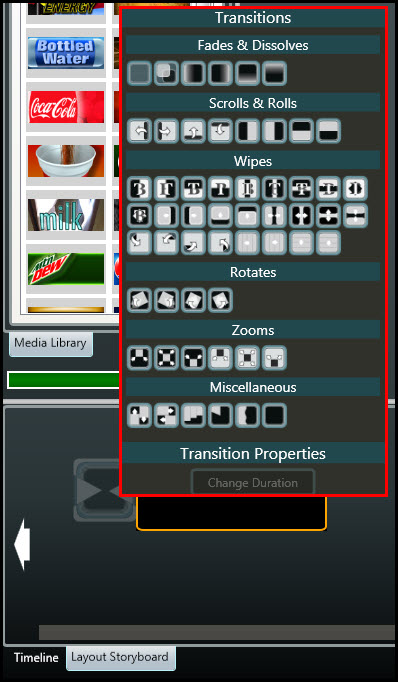
- To add Transitions to a layout in Content Studio, click on the Layout Storyboard tab in the bottom left corner and then click on the hourglass icon next to your layout. Be sure to read Laying Out the Layout Storyboard to learn more!
![Hourglass]()
![Hourglass transitions]()
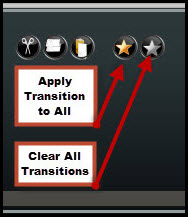
- To add Transitions to layouts in Content Studio, click on the Gold Star button found in the Layout Storyboard.
![Gold Star]()
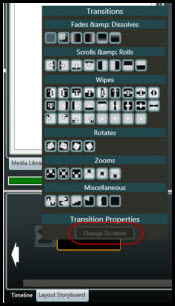
Trainer Tip: You can also modify the duration of a transition when you make a selection from the hourglass icon in the Layout Storyboard and then click on the Change Duration button.
Note: We recommend that you keep transitions subtle. Message comprehension should be part of your core advertising goal. Be sure to allow your viewing audience time to read your messages. If your layout has a short hold time, let’s say 2 seconds, don’t let the transition use up 1 full second. Transitions are great for adding that extra bit of interest, but shouldn’t consume your overall message. After all, the best practice is to create content that is recognizable at a glance, under 2 seconds.
You can also find and adjust the duration of Entry Transitions in the Timeline tab in Content Studio. When you are in the Timeline Tab, you can see what a transition will look like. An Entry-Transition will show as a teal element bar in front of its respective Layout bar. Read the blogs below to learn more about Entry Transitions in the Timeline.
Trainer Tip: You can even make graphics and characters scroll across your display using transitions. This means you can show the entire image/picture, even if it is larger than your display dimensions! Or, you can take a character from the character map, say a car, and have it drive across the screen! We already wrote blogs on how to do these effects. Go ahead and check them out for yourself!
- I didn’t know I could do that! Part 1: Scrolling Characters
- Small Display Help 2 – Scrolling a Graphic
- The Award for Best Effect Goes to. . .
As always, we hope you find this information helpful. Feel free to comment below. Let us know if you have any questions or if you want to know more about any other Venus 1500 V4 features.
If you find our blog useful, be sure to click on the orange “Receive Email Updates” button on the right side of the page to subscribe. Thanks for reading!
Related Knowledge Base Articles:
Entry Transitions:
- How do I add transitions to a layout in Content Studio?
- How do I modify a transition in Content Studio?
- Is it possible to make an image scroll using Venus 1500 V4?
Timeline:


