Back to Basics: Enable the Timeline
Welcome back, everyone! Today we are going to show you how to enable the Content Studio Timeline and explain why you might find it helpful. As you all know, Content Studio is where you create messages for your display within Venus 1500 V4 software. You can access Content Studio by going to the Content Tab […]
Daktronics Commercial Software Training on 4/5/2017
Categories: Venus 1500 Training

Welcome back, everyone! Today we are going to show you how to enable the Content Studio Timeline and explain why you might find it helpful.
As you all know, Content Studio is where you create messages for your display within Venus 1500 V4 software. You can access Content Studio by going to the Content Tab in the Venus 1500 Hub and clicking on the blue Create button.
Layout Storyboard
When you first open Content Studio you will see the Layout Storyboard running left to right across the bottom of the screen. The Layout Storyboard shows you miniature representations of each layout in your presentation. It is enabled by default onto your computer when the Venus 1500 V4 is installed.
- The Layout Storyboard allows you to change the duration of each layout by clicking on the arrows or typing into the field below each miniature layout.
![Storyboard 1]()
- It also allows you to add transitional effects to each layout by clicking on the hourglass icon to the left of each miniature layout.
![Storyboard 2]()
- You can also Cut, Copy, and Paste within the Layout Storyboard by either right clicking on the miniature layouts, clicking on the Cut, Copy, and Paste circular icons in the middle of the Layout Storyboard, or by using the keyboard shortcuts Ctrl + C and Ctrl + V to Copy/Paste and Ctrl + X and Ctrl + V to Cut/Paste.
![Storyboard 3]()
- Finally, you can also drag and drop the miniature layouts (if you have more than one) within the Layout Storyboard to reorder them if you desire.
Enabling the Timeline
I know you aren’t here to read about the Layout Storyboard, so consider that a bonus! You are obviously here to learn how to enable the Timeline tab in Content Studio, so let’s do it!
As I mentioned earlier, you will have to enable the Timeline each time you download the Venus 1500 V4 software as the Layout Storyboard is the default setting. So if you reimage your computer, or get a new computer, and do not see the Timeline tab after you get Venus 1500 V4 reinstalled, simply follow the same instructions (below) as you did when you first installed the software and enabled the Timeline.
- Open Content Studio by going to the Content Tab in the Venus 1500 Hub and clicking on the blue Create button.
![Create button]()
- Click on the Content Studio Application Menu (Orange V) in the upper left corner.
![App Menu]()
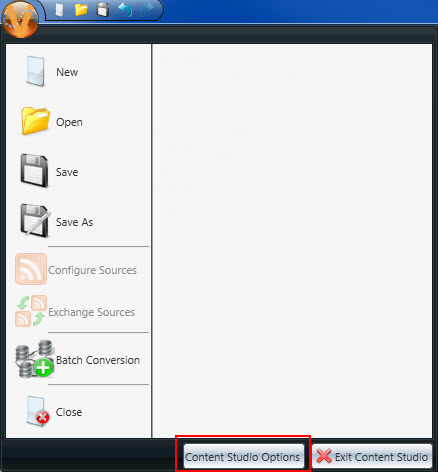
- Click on Content Studio Options on the bottom of the Application Menu.
![content studio options]()
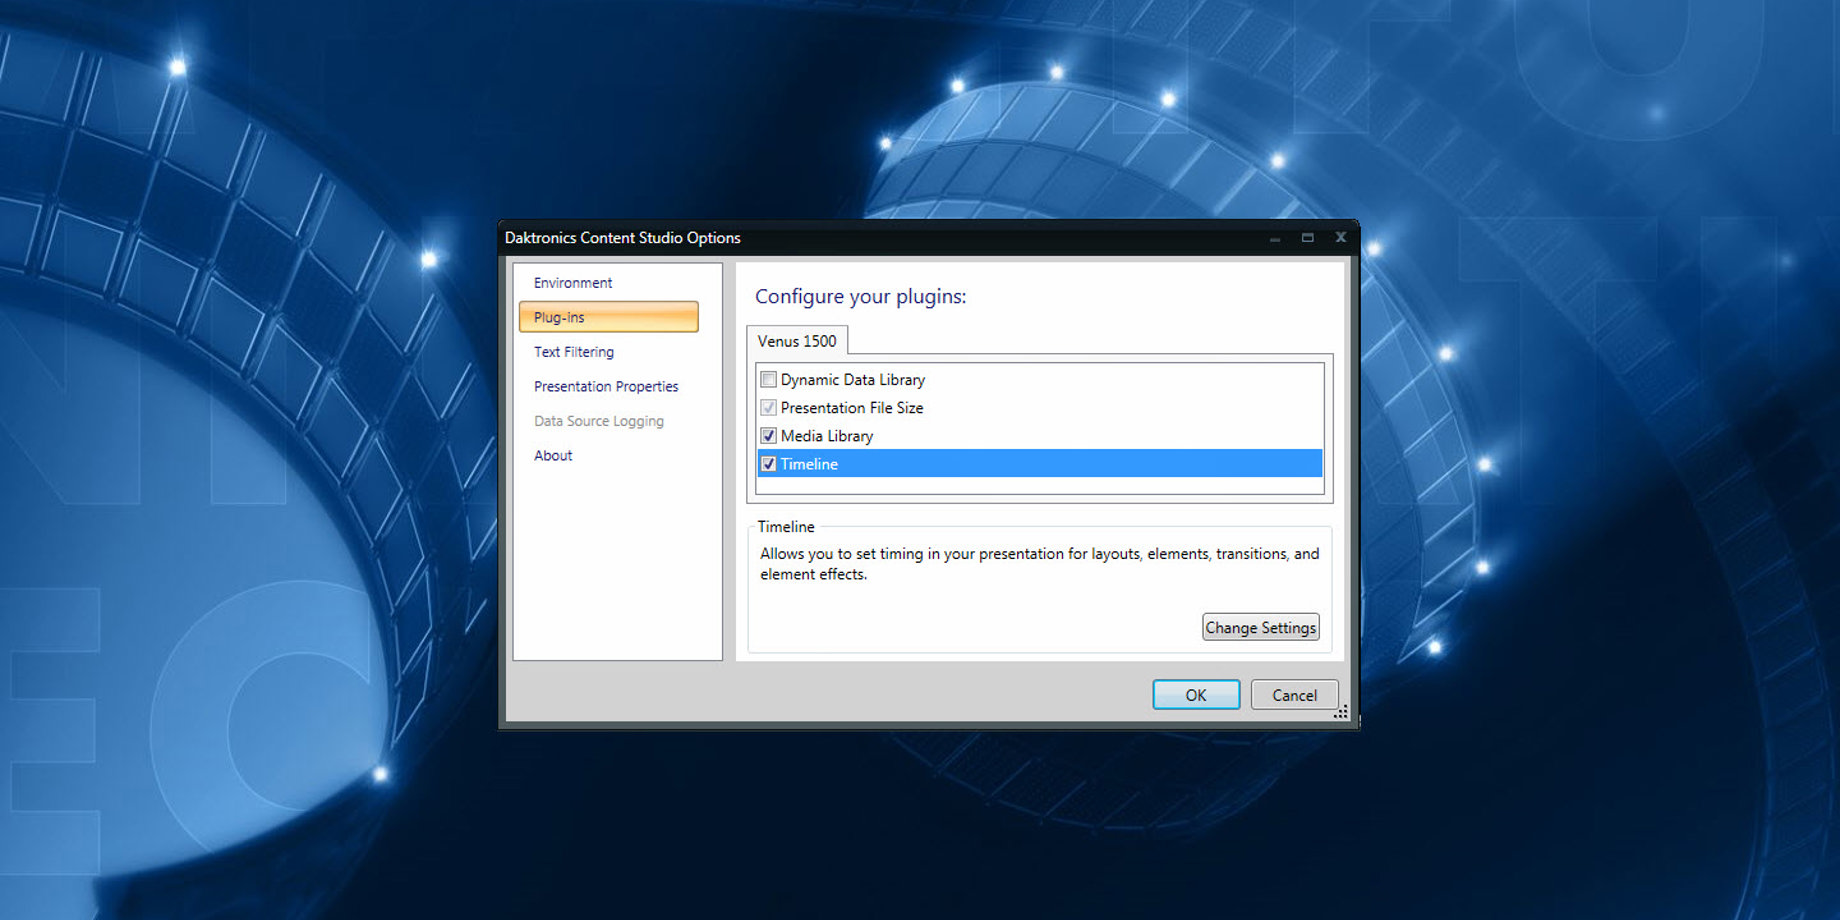
- Click on Plug-ins, found in the Daktronics Content Studio Options window and put a check mark in the checkbox next to Timeline under Configure your Plugins.
![Plugins]()
- Click OK.
Now you will see two tabs on the bottom left corner of Content Studio: Timeline and Layout Storyboard. The Layout Storyboard view will have changed slightly. You will no longer see the field below the miniature layouts to adjust the layout duration. That is because you will now be able to adjust your layout duration in the Timeline tab!

Within the Timeline, each layout will have its own bar. The layout bar(s) will be gray in color and will be named Layout – [1], Layout – [2], etc. Each layout bar will also have a white edge. You can hover your mouse over these white edges, and your cursor will turn into a double-sided arrow. You can then use the white edges on the ends to lengthen or shorten play duration by simply clicking and dragging.

What is the best feature of the Timeline and the main reason why you will want to enable it? Enabling the Timeline allows you to change the duration of the layout itself, and also the durations of all the different elements inside the layout.
What I am referring to when I say “elements,” are text boxes, images, animations and videos, time temp and date fields, scrolling text messages, and paging elements. Basically, anything that you enter into a layout other than text that you type directly into it.
Each of these elements will have a corresponding color assigned to it and will also have white edges that you can click and drag. This allows you to have multiple elements within the same layout appear and disappear at different times! The assigned colors are as follows:
- Text Box = Orange
- Pictures and Videos = Red
- Scrolling Text = Green
- Paging elements = Gray
- Time temp and date = Orange and Brown swirls

If you want to make the duration of an element longer, you will first have to make the duration of the layout bar longer. An element cannot be longer than the layout itself. In contrast, you cannot make the layout bar any shorter than the elements below it, so you will first have to shorten the element bars.
Trainer’s Tip: Avoid blank time on your display! Always remember, when adjusting the duration of the elements below a Layout bar, to make sure that at least one element is the same length as the layout bar itself.

Previous Posts
We have written an entire series on how to use the Timeline, so if you like the Timeline and think you may switch to it, we recommend checking these out first!
- Using the Content Studio Timeline Part 1
- Using the Timeline Part 2
- Using the Timeline Part 3
- Using the Timeline Part 4
- Using the Timeline Part 5
- Using the Timeline Revisited
We hope you found this week’s post helpful! Be sure to click on the orange “Receive Email Updates” button on the right side of the page to subscribe. Thanks for reading!


